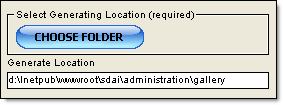
1. First select the folder where you would like to generate your files. If you will be using IIS (Internet Information Manager) then you will want to generate your files in the wwwroot folder where your IIS directory resides.
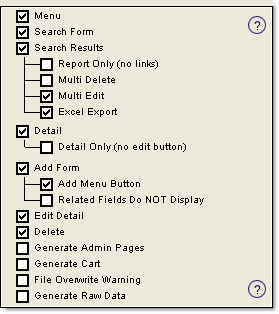
2. Choose the pages you would like to generate and any options:
Note: If you are wishing to preview your Web pages locally (before uploading them to a server), you will need to install IIS (Internet Information Server).
In this case, your generated files can be in a subfolder of your choice but the subfolder must be contained by the folder that the Internet Information Manager uses. Typically this folder is C:\inetpub\wwwroot on Windows NT / 2000 / XP systems and either C:\webshare\wwwroot or C:\inetpub\wwwroot on Windows 95, 98 and ME systems.
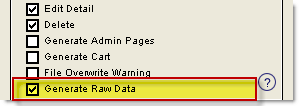
Now we've introduced the ability to generate pages with minimal styling to make it easier to get in and custom tailor the pages to fit the look of your website. Simply click on the "Generate Raw Data" checkbox to take advantage of this feature.
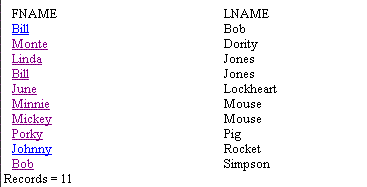
Below you will see an example to give you a better idea of a search results page using the raw data feature.
HTMLarea Users:
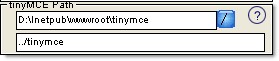
If you have chosen to use the new tinyMCE htmlarea option then you will need to locate the path to the tinymce folder so that ASaP will know the relative path to the tinyMCE sources files.
Note: To suppress the "Powered by Data ASaP" tag at the bottom of the generated pages simply hold the control key (Ctrl) whilie pressing the Generate button.
Click Next when you are satisfied with your selections for this page.
See "DSN" for more information on DSNs.